handmade success
How to conduct a simple candle burn test
We show you how to conduct a simple burn test for your candles.
When making candles, it is really important to conduct candle burn tests to make sure the candle meets safety and performance standards.
Regardless of whether you will be selling your candles, a burn test will provide you with an idea of how well designed your candles are, helping you optimize their performance while maintaining safety standards.
If you are looking to conduct a simple candle burn test, read on to find out how.
Need to get your raw material and product inventory under control?
Try Craftybase - the inventory and manufacturing solution for DTC sellers. Track raw materials and product stock levels (in real time!), COGS, shop floor assignment and much more.
It's your new production central.
What is a candle burn test?
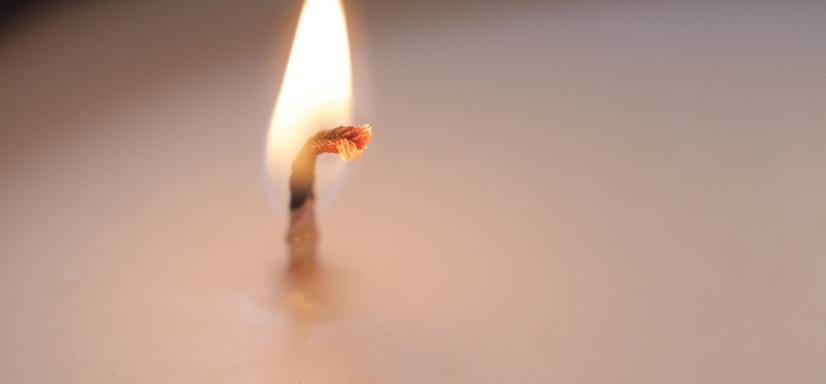
A candle burn test is really just a method of testing to see how well a candle burns. This is done by burning the candle under controlled conditions and observing the flame, wick, and melted wax.
A candle burn test can last as long as a few weeks, depending on your candle, as each candle in the test will need to be burnt in until the candle is either used up or fails. As candles are combustible, it is important that your candle can fill a room with aroma, without sacrificing safety.
The purpose of a candle burn test is to check if your candle making process meets certain safety and performance standards, such as:
- The candle should not drip or smoke excessively
- The candle should have a well-defined flame
- The candle should not burn for more than 4 hours
Why you should conduct burn tests on your candles
Candlemakers typically use this test to prove to customers and themselves that their candles are safe, with an appropriate hot throw.
As mentioned, this candle burn test can help make sure your candle meets the necessary safety and performance standards.
Another purpose of this candle burn test is to tell if your candle needs a larger, smaller, or different wick. As fragrances and waxes have different thicknesses and viscosity, you will need to use a proper wick for your candle to perform safely. For example, thicker fragrance oils and high viscosity waxes will need a thicker wick, as compared to thinner fragrances and waxes.
Read more:
How to conduct candle burn testing

Before you begin…
The most important part before conducting a test burn is to make sure your candles are made and substantially cured.
Waiting for your candle to cure for the recommended amount of time is a necessary step before starting your burn testing.
As wax changes dramatically as it hardens, starting your candle burn test before it is properly cured can result in a misleading test result. Remember that patience is needed, especially when waiting for your candle to cure.
If you intend to test multiple candles at once, make sure they are clearly labeled with batch numbers if possible.
To conduct a basic burn test, you will need the following materials:
- A candle
- A lighter or matches
- A stopwatch or timer
- A pen and paper
Set up your candle on a stable surface, away from any flammable materials. Light the candle with a lighter or matches, and start the timer.
Observe the candle flame, wick, and melted wax for the next 4 hours. Make note of any irregularities, such as if the candle starts to drip or smoke excessively.
Once 4 hours have passed, extinguish the candle flame and observe the candle wax. The candle is considered to have passed the burn test if:
- The candle has burned evenly across the entire width of the wick
- There is less than 1 cm of wax remaining in the candle
If the candle has not burned evenly or there is more than 1 cm of wax remaining, the candle has failed the burn test.
Once you have the basic idea of a candle burn test mastered, you can move on to implementing the more standardized ASTM one.
ASTM standard burn test
The American Society for Testing and Materials (ASTM) is an international standards organization that develops and publishes voluntary consensus technical standards across materials, products, systems, and services.
Read more: Don’t get burned! Know the legal requirements for selling homemade candles
While the candle-making burn test we described earlier is a good way to get started, the ASTM candle burn test is a more standardized version that candle makers often use. This is to make sure their candles meet certain safety and performance standards set by the ASTM.
The ASTM candle burn test involves the following materials:
- A candle
- A lighter or matches
- A stopwatch or timer
- An exhaust fan (optional)
- A pen and paper
Trim the wick to 1/4 inch.
Place your candles on a flat heat resistant surface. If you are testing multiple candles, keep each candle 3-6 inches apart.
This area should be clearly visible as your candles should not be left unattended while lit, especially so when testing new wicks.
Light your candles and take note of the time.
After 2 hours, observe the candles and take note of any noticeable details, such as the melt pool and wick appearance.
After 4 hours, observe the candles once again, taking note of noticeable details, before blowing out the flame.
Allow your candles to cool for at least 5 hours and repeat until the entire candle is completely burned.
Customising your candle burn test
While the ASTM candle burn test is a great way for candle makers to test their products, you may want to modify it slightly to better suit your needs.
For example, if you are testing a new candle fragrance, you may want to increase the burn time to 8 hours to better understand how the fragrance will develop over time.
You may also want to test different wicks to see which one burns the candle more evenly.
As an example of a customized process, check out Black Tie Barn’s video on their candle testing strategy.
Burn test results
By observing your test results, you will be able to identify if your candle needs a bigger or smaller wick. Use the table below to match what you observe with the likely cause and fix:
| Observation | What it means | Action |
|---|---|---|
| Flame height greater than 3” | Wick is too large | Try a smaller wick size |
| Excessive black soot on jar or glass | Wick is too large | Try a smaller wick size |
| Carbon mushrooming (balls ≥ 5mm) | Wick is too large | Try a smaller wick size |
| Container temperature exceeds 140°F | Wick is too large or fragrance load is too high | Try a smaller wick or reduce fragrance % |
| Large melt pool with minimal hot throw | Wick may be too large or wax blend needs adjustment | Adjust wick size and review wax/fragrance ratio |
| Candle tunneling (melt pool doesn’t reach edges) | Wick is too small | Try a larger wick size |
| Flame extinguishes before candle is finished | Wick is too small | Try a larger wick size |
| Wax remaining on sides after candle finishes | Wick is too small | Try a larger wick size |
Keep in mind that each wax, fragrance, and vessel combination is different — what works for one candle recipe may not work for another. Document every test carefully so you can build a reliable reference over time.
Tracking your burn test results
Consistent record-keeping is what separates a repeatable candle recipe from a lucky first batch. When you document every test — wick size, flame height, melt pool width, soot levels, container temperature — you create a reference you can return to whenever you change a variable.
A simple spreadsheet is a great place to start. Our free candle inventory spreadsheet gives you a ready-made structure for tracking your materials and batches, which you can extend to capture burn test observations alongside your recipe data.
For a more structured approach, candle inventory software like Craftybase lets you attach notes directly to individual manufacturing batches — keeping your burn test records alongside the exact recipe, material quantities, and batch details used. This makes it much easier to spot patterns across tests and know precisely which batches are compliant and ready to sell.
Using batch manufacturing software to track your burn tests
Batch manufacturing software like Craftybase can help with the task of your burn tests by allowing you to track not only your candle recipes but also your batches and full manufacturing process. This way, you’ll have the records you need on hand to make sure your tests are compliant.
To learn more about how Craftybase can help you track your candle manufacturing process, sign up for a free trial today.
Frequently Asked Questions
What is a candle burn test?
A candle burn test is a structured method of evaluating how a candle performs under controlled conditions. You light the candle, observe the flame height, melt pool, wick behaviour, and soot levels over several burn sessions, and record the results. The goal is to confirm the candle is safe, burns evenly, and delivers the intended hot throw before selling or gifting it.
How long does a candle burn test take?
A complete candle burn test can take anywhere from a few days to several weeks, depending on the burn time of the candle. The ASTM standard method calls for 4-hour burn sessions followed by at least 5 hours of cooling, repeated until the candle is fully consumed. Larger candles with longer burn lives naturally take longer to test completely.
How do I know if my candle wick is the right size?
A correctly sized wick produces a flame that stays between 1–2 inches tall, creates a full melt pool that reaches the edges of the container within 2–3 hours, and produces little to no soot. If you notice tunneling (the wax pool doesn't melt to the edges), the wick is likely too small. If you see excessive flame height, soot, or carbon mushrooming, the wick is too large. Test one wick size at a time to isolate the variable.
What should I record during a candle burn test?
At each observation point, record the flame height, melt pool diameter and depth, wick condition (including any carbon build-up), container surface temperature, soot deposits on the jar or glass, and your subjective rating of the hot throw. Note the date, time, ambient temperature, and the exact candle recipe and wick type being tested. Consistent recording makes it easy to compare results across different wick sizes or formulas.
Do I need to burn test every candle I make?
You don't need to burn test every single candle once your recipe is validated. The key is to burn test whenever your recipe changes — a new wax supplier, a different fragrance oil, a new vessel shape, or a change in fragrance load all require a fresh test. Once a recipe is confirmed stable and safe, you only need periodic re-testing when materials or processes change.
Conclusion
A candle burn test is a great way to check if your candles are safe and fit for purpose. By following the steps outlined above, you can easily conduct a candle burn test at home.
